Sunday, October 14, 2012

Stuffed Peppers

Not gonna lie, I don't think this is much of a recipe because really I just took anything I had in the fridge to make this and kinda winged it but I figured if anything you can learn a little something about improvising.  Recipes for me a just a guideline but I don't follow them most of the time.  


Ingredients:  
Salt and Pepper
10 Small Peppers (I used the last of the peppers from our garden this year!)
1/4 of a large onion, chopped
1 Left Over Chicken Breast
Instant Rice
1/2 C Croutons
Chicken Stalk

Directions:
1. Pre-heat oven to 350 degrees.  Prep the peppers by cutting the tops and emptying out the insides.

2. Make the rice according to the package directions except add half of the liquid as chicken stalk.  That will give the rice a lot more flavor.  Set aside. 

3. Cut the chicken into bite size pieces as well as one pepper and the onion. On the stove-top cook down until nice and tender. Salt and pepper as you go along.  Once it's cooked mix it with the cooked rice. 

4. Salt and pepper the inside of the peppers and spoon in the rice mixture into the pepper. Crumble the croutons in a small baggie and sprinkle on top. You might have to push down a little so they nestle into the top of the pepper. 

5. Cook for about 15-20 minutes until the peppers looked cooked through and the top of the croutons are nice and golden brown.  

I say this is a nice meal, hubby said it was a snack.  You be the judge.
Enjoy!

Friday, October 5, 2012

Fall is soooo close! I can taste it!

The air is crisp, the leaves are changing color and the fall decorations are making their rounds around the house.  Ahh... the smell of fall! I can't get enough.  

I pulled out the table goodies.


I decorated the front door.


...and I even made a yummy recipe.  Stuffed peppers! Recipe to follow shortly!
Recipe Here (Link)


Monday, October 1, 2012

Art Prize 2012

This weekend was full of lots of fun. Hubby and I spent a busy weekend with friends and family.  One of the best parts of the weekend was spending time with my sister in law Molly and Hubby.  We went downtown Grand Rapids to check out Art Prize.  There were so many people around, it was super crazy.  We got to see just a fraction of what is around the city.  We saw a massive trend of animal art and decided to do some funny picture poses. 

Hubby and Mol doing the T-Rex Pose

Mol doing the Robot Pose (ok, thats not an animal...but it was still cute)

 Horses?  Well... it was attempted at least.

Cute little penguins!

We also hosted a party this weekend for the student dispatchers that work at Jeff's Police Department.  There was major cooking and baking going on but it came out pretty close to perfect.  The only thing we forgot was napkins and I was able to get those before I left the house with the chicken fingers. We also had an assortment of dipping sauces, cinnamon sugar fruit salsa with cinnamon sugar pita chips and my recipe for mini chocolate chip cheesecakes. All in all I would say the party and the weekend as a whole was a great success!


Saturday, September 22, 2012

My hubby is officially a sergeant!

My hubby is officially a sergeant!  I am such a proud wife. =)  I made some sergeant cookies in the shape of the stripe badge to bring into the police department and I wore my sergeant wifey shirt my hubby surprised me with.  Of course with had to take a picture for the first day.  It's moments like this you need to make sure to document.  It's going to be so much fun to see all his police pictures when he retires. =)


Congrats on your first week!

Tuesday, September 4, 2012

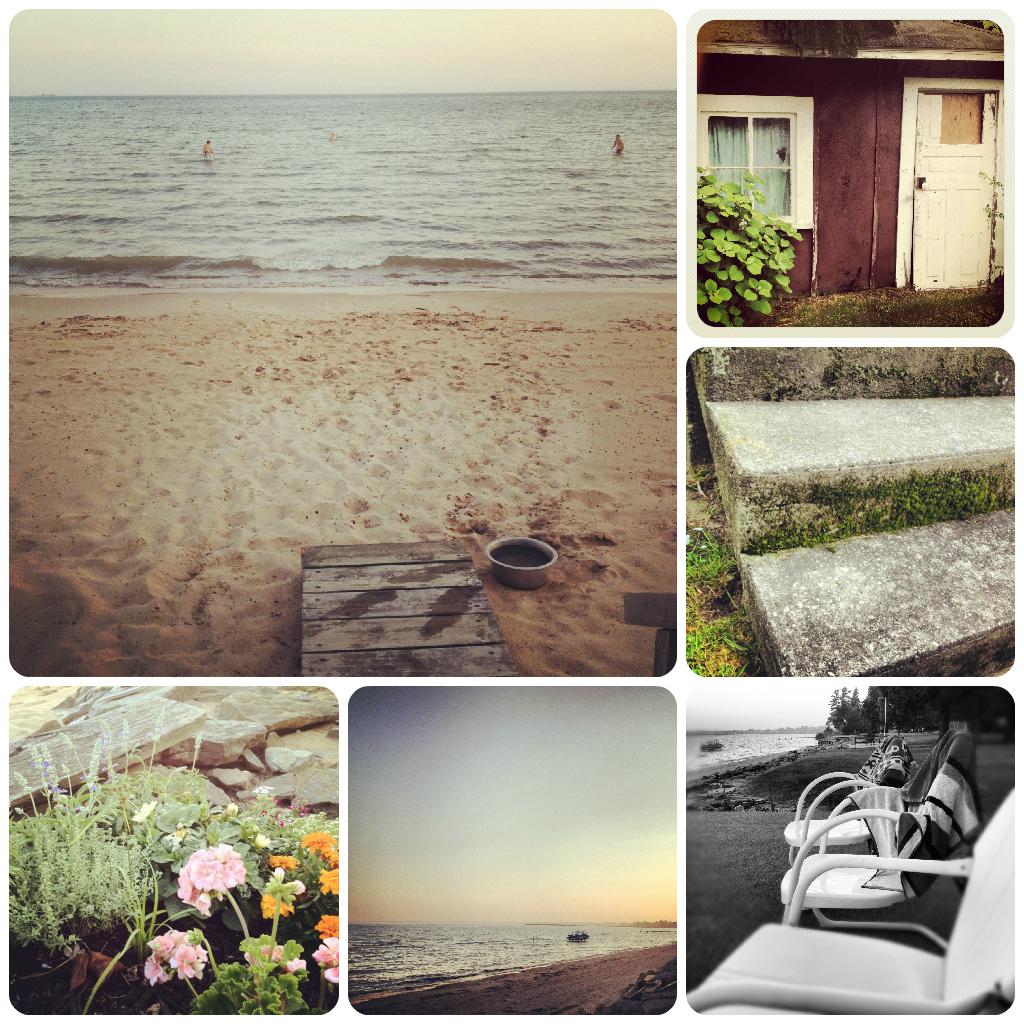
Summer Instagram Update

For all of you who do not follow me on Instagram... you should. =)  But if you don't, here is a quick summer updates from the world of my Instagram pictures.


1. First up we have some cute family pictures: a. cousins wedding shower b. summer baseball trips c. home improvement projects d.outdoor food enjoyment
2. Houston Vacay: a. Grand Rapids airport b. Houston skyline c. DragonCon 2012 d. NASCAR
3. Outdoor Fun: a+d. Jeff's triathlon b. Whitecaps baseball c.Family competition at it's finest
4. Summer Fashion: pretty self explanatory. =)
5.. Food!: a. about 1/100th of the tomatoes picked so far b.Yummy cucumbers c. cinnamon lava cake d.enjoying some wine and sun

And there it is guys.... another summer update in Instagram photos!

Monday, August 27, 2012

Chocolate Cinnamon Lava Cake

Once in a while hubby and I get a really intense craving for some dessert.  Usually on the weekend after a lazy day marathon cuddling on the couch. This time I took inspiration from a classic dessert we had at our favorite restaurant 616.  I must admit, although it's looks did not turn out quite restaurant worthy the taste was definitely there. It was amazing. It was like a warm brownie on the outside and ooie gooie on the inside.  Simply divine. 
Ingredients:
6 6oz ramekins
Pam
Unsweetened baking cocoa 
6 oz chocolate chips (about 1/4 of a normal size bag)
3/4 cup butter or margarine
1 teaspoon vanilla
1/4 teaspoon ground cinnamon
4 eggs
1 1/2 cups of powdered sugar
1/2 cup of  Bisquick mix

Directions:
1. Pre-heat the over to 450 degrees. Spray the inside and sides of six oven proof ramekins.  Sprinkle the cocoa powder on the sides and the bottom of the ramekin so it's completely covered. Place on top of a pan just in case they cook over and drip although they shouldn't.

2. In a pan mix the butter and chocolate together until they are completely melted and mixed well. Stir in vanilla and cinnamon and take of the heat.

3. While you're waiting for the chocolate to melt, mix the eggs and powdered sugar in a seperate bowl .  Once the chocolate mixture is melted, slowly add the mixture to the eggs.  Make sure it's slow so you don't cook the eggs, they have to slowly come up to temperature.  Once the mixture is well mixed add the Bisquick mix and stir well.

4. Divide the mixture and separate evenly among your ramekins. Pop them in the over for about 12-15 minutes.  Once you take them out make sure to cool them for about 5-7 minutes.  Scrape along the sides to better get them out of the ramekin. (this is where I had my little issue)  Put a plate on top of the ramekin and flip onto the plate.  Sprinkle with powdered sugar and add your favorite chopped fruit on top.


And that's it!  Pretty simple as ussual and way yummier than just a plain old piece of cake. 
I should call this more of a cake/brownie, but I'll let you be the judge. 
Enjoy!

Wednesday, August 15, 2012

ETSY "about me"

Etsy has finally came out with a great new feature called the "About Me" section.  It's such a great way to showcase small amounts of information and all the pretty things you're selling in your shop. 
Check out my NEW "About Me" section!


...and here is the link in case you wanna check out the rest of my items!  {Link}

Thursday, August 9, 2012

Thanksgiving Onesie

Do you have a little one coming just in time for Thanksgiving?  
If you do, it's not too early to plan their outfit!  
Consider this little cutie now available at my shop.  
Last year they were super popular. 
So cute for a boy or a girl and we can work on a different color scheme if you want! Let me know!


To purchase, check out my ESTY shop!

Tuesday, July 17, 2012

Do You Have a Crazy Family?

I seriously feel like when my husbands side of the family gets together they decide to act like children all over again.  I love it.  Remember when you were kids and you made up random games just to pass by time?

Well here is my husband and my brother in law doing just that.  Goal of the game: throw a baseball on top of the roof from a far distance and run fast enough to catch it before it falls to the ground.
Such joy when accomplished. =)
Boys...

Friday, July 13, 2012

Summer

Here is my summer so far... 


Don't you just love summer?!

Wednesday, July 11, 2012

Wonton Chicken Burrito

I'm still super obsessed with wonton wrappers.  They are so amazing and I'm always finding new ways to use them.  I'm also constantly trying to figure out new chicken dishes. Today, lets make a healthier version of a burrito! The Wonton Chicken Burrito! This burrito will melt in your mouth; literally.  The wonton wrapper gets slightly crispy but the inside is so tender, juicy, cheesy and gooie.... yum... you'll love it!


Ingredients: 
9 Large Wonton Wrappers
About 3 Cups of cooked and well seasoned shredded chicken.
(You may also use a rotisserie chicken if it's easier)
1 C Shredded Cheese (your choice)
Marinara Sauce
Fetta Cheese
Pam or any other cooking spray
Salt & Pepper

Directions:
1. Pre-heat the oven to 350 degrees. Lay out  your wonton wrappers on a nice clear surface. Spray with Pam to keep them moist.  Season the wrapper with salt and pepper. 

2. In a separate bowl  mix the chicken and the marinara sauce.  Add as much sauce as you like just keep in mind that if you don't put enough in it may be dry but if you put too much in the burrito will be too soggy and it'll just ooze out.

3. On your wrappers all a little of both cheeses and a scoop of chicken.  Fold the wrapper like a burrito. ...hence the name. To secure the corners dab a little water around the edges of the wrappers so they stick together.


4. Put the burritos on a cooling rack on top of a pan so they can cook well on all sides and get the least soggy possible.  Spray the burritos with a little more Pam and salt and pepper the tops.  The Pam is great so the seasonings stick to the tops!

5. Pop them in the over until crust is golden brown; about 12-15minutes.  Since everything on the inside is cooked the wrappers are the only thing you really need to worry about cooking.

Serve with some marinara sauce on the side and enjoy!

Friday, July 6, 2012

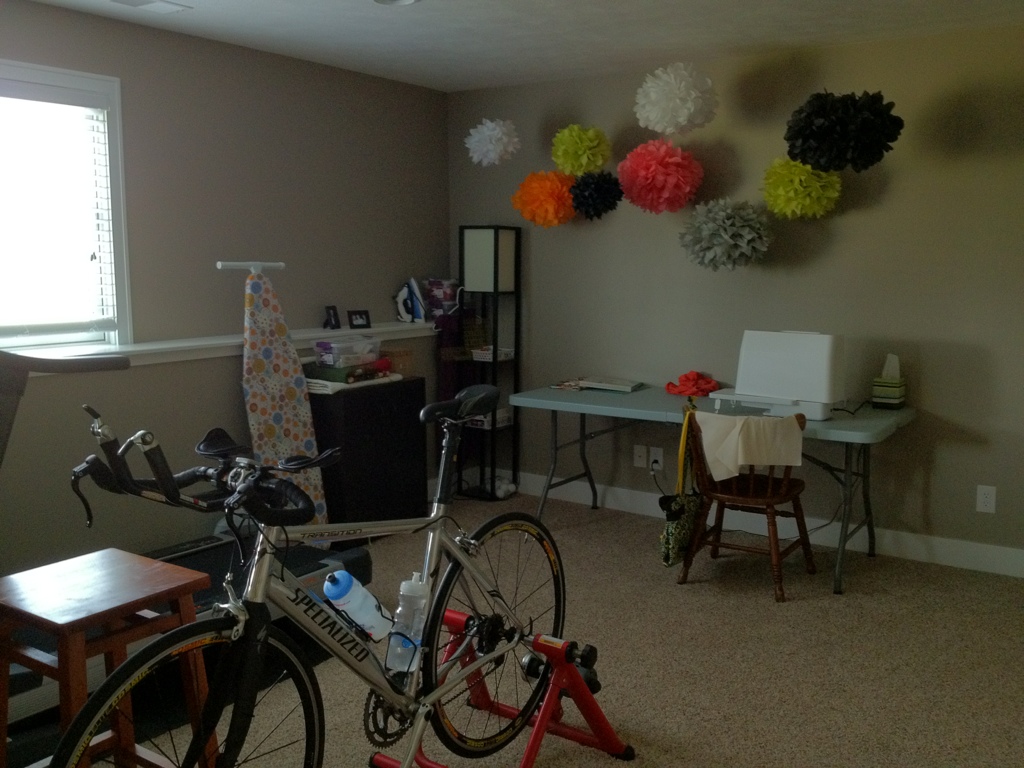
New Office Makeover

We've been wanting to clear up the upstairs bedroom for a while now, almost a year now after our first miscarriage, just in case we get pregnant again. =)  I finally got Jeff to take me to IKEA and buy our new office furniture, and after one good morning of hard work we got it all put back together and decorated in the empty part of the basement.

We moved to a new house and took our office furniture with us!  
Take a look at what we did with it this time!


My favorite part of the office are the clear desk chairs! They are so modern and so me!  Everything is super organized just the way I like it! I still even have room for all my sewing items and plenty of space to sew. 
Check out the before pictures.

Before:

What we bought:
EXPEDIT shelving unit in white - LINK
EXPEDIT insert with two drawers - LINK
EXPEDIT desk in white - LINK
EXPEDIT insert with mirror door - LINK (2)
TOBIAS Chair - LINK (2)
KASSETT boxes (pack of two) - LINK In two sizes

Wednesday, June 27, 2012

Home-Made Garlic Parmesan Croutons

It's so normal to think that getting items at the grocery store is easy and convenient and most people never consider making the same thing at home because it's too difficult, there are too many ingredients, or it takes too much time. I tend to think that if you make it at home it'll be much healthier and you don't have to guess the millions of ingredients that were put inside to make it taste the way it does. 
Today, lets try making garlic Parmesan croutons at home!
Ingredients:
Stale bread - a loaf, you pick the size, no measuring for this recipe.
Garlic Powder
Onion Powder
Dried Parsley Flakes - or fresh if you have some in your herb garden
Olive Oil
Salt
Pepper
Parmesan Cheese

Directions:
(the most super simple thing ever!)
1. Turn on the broiler to low
2. Cut the bread into cubes, about an inch, smaller maybe if you have kids...but I like the big ones. Drop your cubes onto a sheet pan and spread them out so they fit in one layer.
3. Drizzle well with olive oil and apply the seasonings on top.
4. With your hands toss around all the cubes so they are as evenly covered as possible. Spread the cubes on the sheet pan.

5. Pop the pan in the oven about 10-15 minutes until golden brown.When you take them out drizzle them with some Parmesan cheese and toss again. 


These are so good warm out of the over as a snack, half of them are usually gone before they have time to cool thanks to my husband..... go figure. Otherwise but them in a ziplock bag and store them in your pantry for up to a week and they will be perfect with your daily salad.  Yumm....

For a quick view at other great ideas from All The Pretty Things you can also check out my PINTEREST board!

Wednesday, June 13, 2012

How to Fold a Wonton Bite

There are many ways you can fold a wonton wrapper depending on size and the type of food you plan on making with that wrapper.  I'm just going to show the basic fortune cookie fold. 


1. Top Right - Start by filling your wonton wrapper - make sure not to overfill the wrapper so it doesn't ooze out. Dip your finger in water and run it along all the sides of the wrapper. This will seal the wrapper.
2. Bottom Right - Fold the wrapper in half - corner to corner.  Seal the edges with your finger
3. Bottom Left - With a finger, push the center of the wrapper in pushing your filling closer to the top and making the wrapper bend corner to corner. 
4. Top Left - Fold the corners on top of each other and dab a little water in between the corners to hold them together. 

That's it! Super fast, super simple!
...and when you're done you can have a bigillion of them to pop in the oven.


Tuesday, June 12, 2012

Bummer!

I feel like most of my recipe creations tend to turn out at pretty decent if not delicious, at least that's what my husband tells me, but even I can acknowledge that once in a while I make some poor cooking choices and mistakes and really ruin some could-have-been-amazing food.  

Exhibit A:

Although these may look (and actually taste) pretty delicious, the mess it took to get these six little bites was ridiculous.  I decided to make some wonton cheese bites as a small appetizer and in an unhealthy moment wanted to fry them instead of bake them.  I get the pan all nice and hot full of hot oil and dip these little cuties right in the oil.  By the time I got the last one in the pan my whole front side; clothing, face, hair and all the counter space within five feet of the area was completely covered in oil. I quickly tried to put the cover on until I started to smell very cooked food and I knew it was ready to turn. Problem was, I still had hot oil jumping all over the kitchen.   Needless to say, it was one of the worst ten minutes of cooking I think I have ever done.  I spent about a half hour after this mess cleaning up the entire kitchen top to bottom.    

Sometimes things just don't turn out in the kitchen. We all have those moments when we think it'll turn out a certain way and instead your wonton wrappers throw you the finger and tell you "next time remember to bake me you unhealthy woman!" =)   In my opinion, half the of cooking is enjoining the time you spend in the kitchen weather it's with your cute husband or finally getting that moment away from the stress in your life. So enjoy! and don't sweat the small stuff. It'll work next time. (Hopefully)

Thursday, June 7, 2012

GVSU Enrichment Dinner 2012

I was finally able to put my gold inspiration look to good use last night when my husband and I went to the GVSU enrichment dinner.  This was out second time and after seeing all the beautiful gowns of last year I decided to step it up.  Of course, when I went searching for a dress I found absolutely nothing.  I freaked out all the way home just hoping that I would have a little black dress in the closet that I could at least throw on since I waited to the very last minute to even consider shopping for this year.   
When I got home, instead of going straight to my closet I decided to give the internet one quick search hoping I could find a killer dress that would ship overnight....with no luck, but I did come across a website called renttherenway.com.  

This is where I found my dress!  I was so lucky that they had my size and lucky for me they ship super fast.  They are designer dresses at a really affordable price to rent.  When you're done with the dress you just put it in your pre-paid shipping envelope and return it.  No dry cleaning or anything! Super easy!

I got many complements on my dress throughout the night and we had a very entertaining evening. =)

Saturday, June 2, 2012

Gold...a great summer wedding look!

 The shoes might be expensive but the outfit look pretty killer! =)
I've really got to do a major shopping trip.
Gold...a great summer wedding look!


Badgley Mischka mini dress
£115 - theoutnet.com


BURAK UYAN stiletto shoes
$860 - stylebop.com


A Wear wedding handbag
£20 - awear.com


LK Designs gold butterfly earrings
€80 - pret-a-beaute.com

Summer Drinks!

I would love to say that everything I cook comes from my own genius mind, but unfortunately it does not, and although this summer recipe adventure was a way for me to re-do and re-invent other recipes I did find one that was just perfect the way it was.  This one was found on Pinterest of course... as many good things in life are found. 

This delicious drink I found was called Sarasota Lemonade and you can find the VERY simple but delicious recipe at The Pampered Jes.  I made two batches throughout the night, although it should have been more like four with how fast this got finished.  It was so refreshing and sweet; perfect for summer.   Check out The Parmpered Jes and let me know what you think!


[The drink container is from Pottery Barn and you can find it HERE. Wine glasses from Target]

Thursday, May 31, 2012

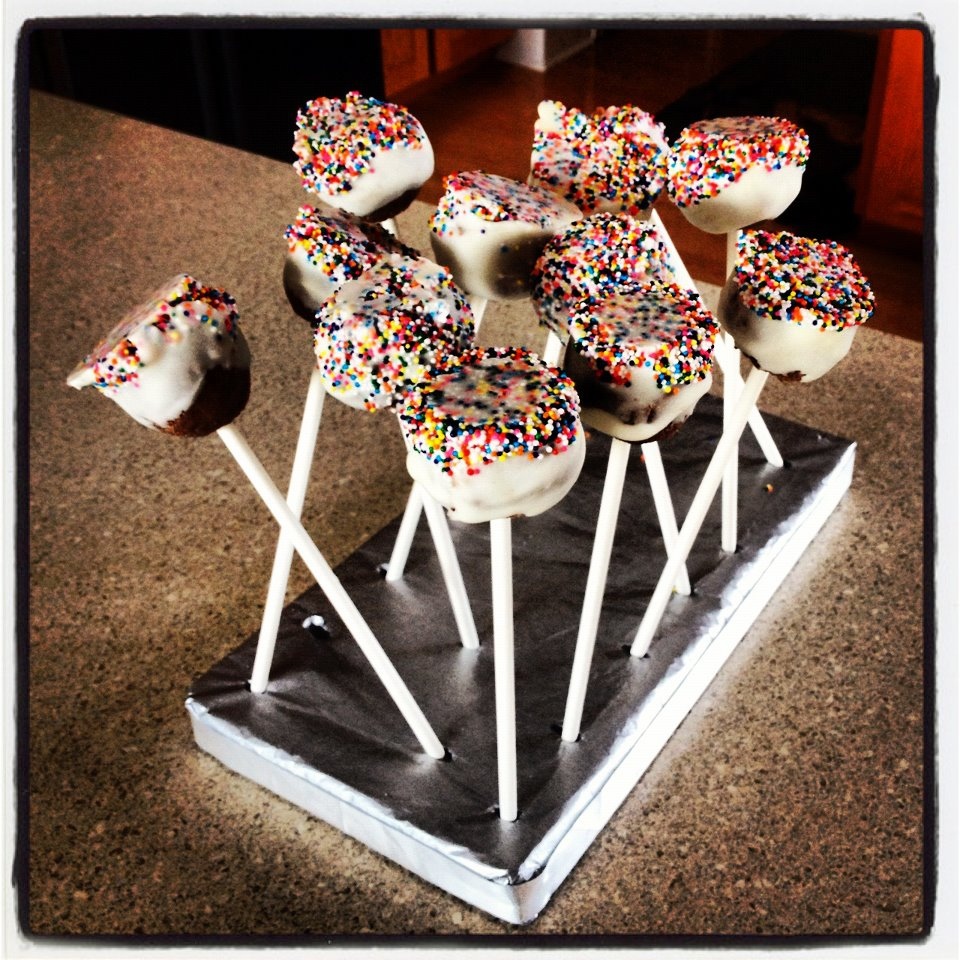
Cake Pops!

Unfortunately the last couple of weeks have not been filled with a lot of cooking... mostly because I've been on vacation but I guess that's not all that bad.  We did a lot of eating out at restaurants in Texas and Arizona so it was fun to eat at new restaurants that we don't see as ofter around here. 
While I was in Arizona visiting my sister she introduced me to cake pops! They were delicious! They were so good that I decided I had to make my own version.  It was pretty simple too!

I didn't take pictures of my process and honestly I didn't even write much of a recipe down so I'll try to re-cap as best as I can. 
TIME: about 3 hrs
MAKES: about 25 cakepops

Ingredients: 
Lolipop sticks
Any kinds of your favorite chocolate
Box of cake mix
Container of frosting of your choice
Decorations for your cake pops

Directions:
1. Make your cake as directed of the box and let cook.  
2. Crumble your cake into a large bowl and mix with the whole container of frosting.  Put in the fridge to cool completely. 
3. Once the cake pop mix is cooled roll into 1in balls and set aside in a container that will eventually fit in your freezer. Freeze your balls completely. If you don't freeze them enough, when you stick the sticks through the balls they might break apart.
4. Take the balls out of the freezer and stick the sticks through them. 
5. Melt the chocolate and dip the cakepops in the chocolate.  You can even use a spoon to help you cover the balls. 
6. Finally decorate as you wish! I just dipped mine in sprinkles... just beware if you do sprinkles you may need more than you think you do so buy a couple of containers just in case.  You can always save the extra for another time. After you decorate, turn the cakepops upside down to cool slightly on some wax paper.  

So that's it! pretty simple but I must say it takes a little longer than I had originally thought it might. If you plan to make a lot of them I suggest maybe doing it ahead of time since they keep pretty well in the freezer for a couple of days.  

Friday, May 18, 2012

10 Minute Parmesan Steak

Say what?! 10 minute steak?  Yep, that's right.  
So there is no reason you can't make this any day of the week. 
Personally I don't like to grill.  The grill scares me.  The grill is for my husband.  But I do LOVE steak... so I had to figure out how to make it yummy, inside the kitchen, and fast.
...because you never know when you're gonna crave a juicy piece of meat.
Ok, so here it goes.

Ingredients: 
3 Steak - Mine were about the size of my hand (pretty big) about an inch think (also pretty big)
            Also, I did 3, you could do more or less, depending on how they fit in the pan.
1/2 C Parmesan Cheese
small pinch of steak rub for each steak
olive oil
salt + pepper

Directions: 
1. Heat your pan to medium-high and drizzle your pan with olive oil. Once the oil starts to sizzle you know it's time to put your meat in. Meanwhile, prep the meat.

2. You want your meat to be at room temperature so take your meat out of the fridge about 30 minutes before you want to cook it.  (No you don't have to do this but it will make it so the juices flow better when cooking) Lay the meat out on a plate/cutting board/tin foil (for easy clean up). Drizzle with olive oil and season liberally. More than you think, it's a thick piece of meat.


3. Once your pan is hot put it your meat seasoned side down.  Season the other side.  Also, if you have it around you can use a little steak rub on one side for a little extra flavor.  I just add it like I would salt.  If you don't have any around, the skip it.  Keep it simple. 

Let this side cook about 5 minutes for medium.  More or less depending on how well you want the meat cooked.  Flip your meat and lower your temp to medium.  Add the parmesan cheese right on top. Cook side two about 3-4 minutes with the top on and let the cheese melt into a crusty crust.


4. Take the meat out of the pan and rest 3-5 minutes so the juices can soak into the meat.  If you cut the meat right away the juice will run all over the cutting board and not in your mouth and trust me, you want juicy steak. 

I ate just a half of one of the steaks, my husband a whole steak.  I would say one steak is plenty for one person so you can make more or less steak depending on how many people you're feeding. 
Also, these were served with a baked potato and the mixed veggie medley previously posted.


And... ROUND TWO! 
If you make extra you can even make a left over steak sandwich.  Cut the steak into slices with a little light mayo, tomato and lettuce.  Put it on a ciabatta bun and there you have a nice little sandwich!

Friday, May 11, 2012

Mixed Veggie Medley

Today is all about simple... and pretty healthy too. It wasn't until I was married and started going to nicer restaurants that I realized vegetables could actually taste pretty delicious.  In college the only vegetable I would even touch was corn... and my Mom used to tell me that wasn't really even a vegetable, so when I found out you could actually eat them without spitting them back out I jumped all over that wagon.  Here is a recipe for a simple veggie medley.  What's great too is you can pretty much change the kind of vegetables you want depending on what you have on hand, but this is my favorite combination.

Ingredients: 
1lb brussels sprouts
1lb baby carrots
1/3 C bacon bits
olive oil
salt + pepper

Directions:
1. Pre-heat your oven to 400F.  
Prep your veggies; Cut your carrots in half and quarter or half your brussel sprouts depending on how big they are.  You want to make sure they are about the same size so they cook evenly. 

2. Line a cookie sheet with tin foil and put your veggies right on top.  Drizzle them well with olive oil and season your veggies with some salt and pepper.  As Paula Deen once said before, you want the brussels sprouts to be coated with salt like you would coat popcorn.  Obviously that's not the healthiest thing on earth, but it does sure taste better.

3. Finally drizzle the veggies with some bacon bits for a little meaty taste (or leave them out if meat is not your thing).  (Also, my husband wanted to let everyone know that real bacon tastes much better than bacon bits, so if your husband thinks that too, and you feel like getting your kitchen all greasy just to make some REAL bacon... feel free.  Personally I think bacon bit are juuuust fine. =) 

Now, get your hands dirty because it's time for you to mix everything together well.  Toss the veggies around so they are evenly coated and seasoned. Pop them in the oven for 35 min at 400F. Once that's done, but the broiler on low for 2 mins for a little crunchy bite.

Enjoy! 
Three simple steps for some mouthwatering veggies. And hey, maybe even kids could get used to veggies this good!

Wednesday, May 9, 2012

Rehearsal Dinner

I'm so excited for my vacation coming up but planning for more than a couple days is sooo daunting for me.  I just feel like I can never pack enough since I'm constantly changing my mind on what I should be wearing.  Did it get cold? Should I wear a jacket now? What if that jacket doesn't match what I had already planned? Do I even feel like wearing this outfit anyway?  Ugh... I wish you could take your closet with you on trips...

I did however find a great way to decide what to wear.  Have you guys heard of polivore.com?  It's so great because you can find pretty much any piece of clothing in your closet and mix-and -match items right on your computer... which really saves a ton of time trying things on constantly. So here it is, my first outfit for this great trip.  Sara's rehearsal wedding dress!
...and, isn't it just so Texas!?


Rehearsal Dinner


Monday, May 7, 2012

Not Your Mamas (Mini) Cheesecake

Dessert sounded pretty good today and Cheesecake is one of my favorite ones.  Most of the times I can't just have one proper slice of cheesecake. I usually say it's one but I cut the "one slice" about three times too big.  This recipe makes it easier to just stick with one serving... although you might be inclined to take two since they are so delicious.

Ingredients:

- Crust:
5 plain graham crackers (if you want to get super creative, maybe use some cinnamon sugar ones) yumm!
3tbl brown sugar
3.5 tbl butter, melted
small pinch of salt

- Cheesecake:
8-oz cream cheese, softened
1/3 (heaping) cup sugar
1 large egg
1.5 tsp vanilla extract
chocolate chips

Directions:
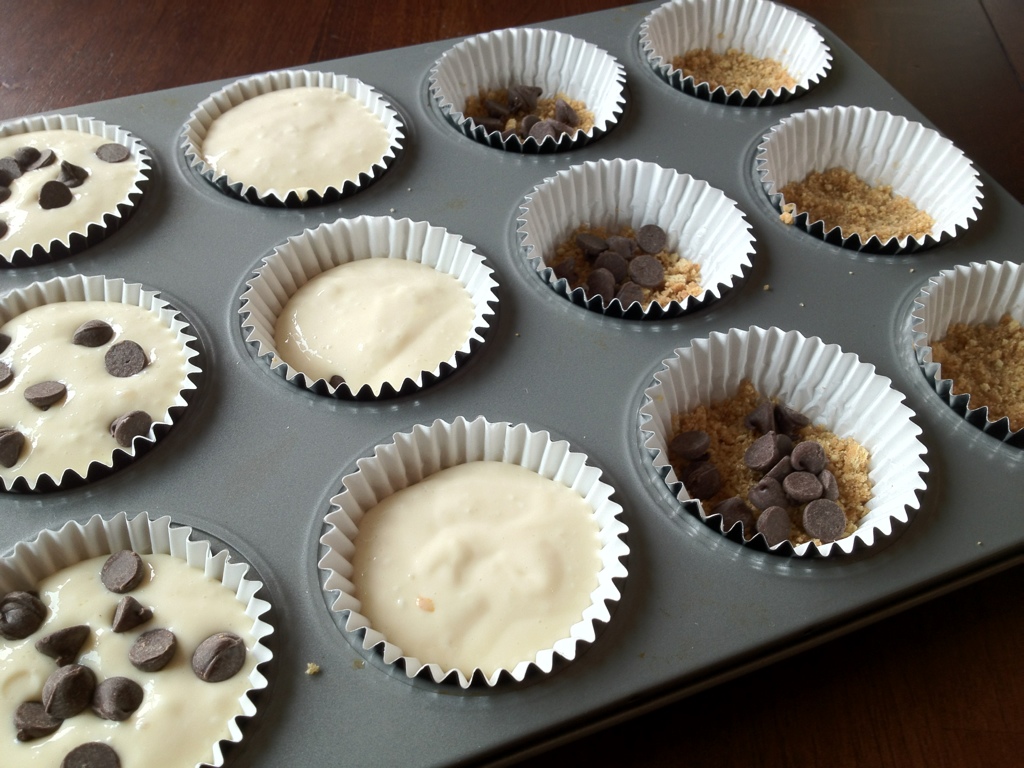
1. Pre-heat your oven to 350F and line your muffin pan with some pretty little liners. To prepare your crust start by crushing your graham crackers in a bowl.  I used a meat mallet which seemed to work pretty well but you way be able to get away with a mug or another sort of sturdy flat bottom item.

2. Once the crackers are crushed, add the rest of the crust ingredients and mix together well.  This will be slightly crumbly so don't worry if it doesn't turn into your typical doughy like crust.


3. Mix together your cheesecake ingredients except your chocolate chips.  Beat together until there are no more lumps.
4. Now you are ready to assemble your cheesecakes.  First, evenly fill the bottom of your muffin cups and push them down with your fingers so is it tightly packed.  Leave about just enough left over to top the cheesecakes at the end like a crumple.  Maybe 1/3 ish of a cup.  Follow the crust by adding a couple of chocolate chips.  Evenly divide cheesecake batter and top with a couple more chocolate chips.  Finally, top with the rest of the crust crumble.


5.  Bake 20-25mins until cheesecakes are golden brown on top and are set.  The batter should not jiggle when you shake the pan.  Let cool and enjoy!

Monday, April 30, 2012

Chicken Parmesan Wonton Bites

Lately, it looks as though on Pinterest there have been an immense amount of recipes including wonton wrappers.  I've never used them before so I figured why not give them a try?  (This of course after I put them on my grocery list for over two months without being able to find them. Did you know they live in the produce area?)

Anywho, last night for dinner I gave it my first try.  Here are my Chicken Parmesan Wonton Bites.


Ingredients:

Package of Wonton Wrappers
5 large chicken breasts (or shredded pre-cooked chicken)
2 C Marinara sauce
Spinach  (about 3 leaves per bite)
1 C Mozzarella cheese
Parmesan cheese
Ricotta cheese
1 tbsp Garlic powder
1 tsp Thyme
Salt + Pepper


Directions:

1. Pre-heat your oven to 400 degrees.

2. Start by cooking through your chicken.  You will eventually want the chicken to be in very small pieces so you can cut the chicken before or after, depends on how much you like to touch the raw chicken.  Season the chicken well at this point.  You want the chicken to be very flavorful so you can taste it when its mixed with the rest of the ingredients.  Also, add the garlic powder and thyme at this point.  (If you want to skip this part you can use left over chicken, or even buy a rotisserie chicken from the grocery store to save some time.)

3. In the same pan as the cooked chicken, (or in a separate bowl) add about half a bottle or about 2 cups of marinara sauce and about 1 cup of mozzarella cheese to the chicken and mix well.


4. At this point find some room on your counter and set up your wonton wrapping station.  You will want to start by laying some wrappers down.  Follow it with some spinach leaves, about a spoonful of chicken, a spoonful of ricotta cheese, and a half spoonful of parmesan cheese.


5. Fill up a small bowl with water and keep it around for easy access.  Once your wrapper is filled, paint the outside perimeter of the wrapper with the water and top the mixture with another wrapper.  You'll want to press the two wrappers together mushing down the filling so it's evenly spread out on the inside.  With some of the bites I tried to mush them down with a fork, but I didn't feel like it made much of a difference.  If you find a better way, let me know.


6. You'll need to but a wire rack on a baking sheet and then plop those babies right on the cookie sheet.  Spray them with a little Pam so they don't dry up and they turn golden brown and pop them in the over for about 12 minutes on until the sides start turning golden brown.

7.  They'll be pretty hot when then come out of the oven so make sure you let them sit, (unlike me who just took a giant bite and then had to spit it out on the counter 'cause it was so hot.  Luckily I was the only one home. =) and enjoy!

I served these with some marinara sauce to dip in and a side of garlic green beans.
Yummy yummy in my tummy!


Just a note to anyone that wants to try this recipe:  make sure you have some time; it took me about 45 mins all together to make.  The actual making of the bites is rather time consuming and I promise it will look much better if you take your time to mush them together properly.  Although, if you don't care what they look like, disregard!

Now... I need some work-out motivation... ugh.

Sunday, April 29, 2012

Fried (but actually baked) Chicken

Yay for the first recipe of the summer!  I'm so excited to start this journey with you guys. So, without further adieu.... here it goes!

I'm a horrible recipe follower.  I always look at recipes for ideas and then do whatever I want to change it to include/exclude things I don't like or think would make the recipes better.  Most of the time I really just wing it and it just works out!  This recipe was an inspiration from the May 2012 issue of the Rachael Ray magazine that featured a whole bunch of ways to make fried chicken.  None of them were quite perfect so I changed it up a bit.


Fried Chicken
Time: Prep:10min, Cook/Prepare: 1hr 15mins
Diffc: Medium

Ingredients:
2 packages of chicken drumsticks (10 total drumsticks)
1 container of buttermilk
1 cup of flower
1 cup parmesan cheese
2 tsp garlic powder
salt + pepper to taste

Directions:
1. Preheat the oven to 425*.

2. Dump the buttermilk into a bowl big enough to cover the drumsticks.  I placed the meaty side down so they stood up and were covered in the buttermilk.  Let them sit for about 30 minutes (or up to 12 hrs. You can do this part ahead of time until your ready to cook)

3. In a separate bowl mix the rest of the ingredients. Coat the chicken thoroughly in the mix and set on a greased broiling pan.  I just used pam. It'll still stick a little at the end of the cooking time but not nearly as bad.

4.  Once the oven is heated up just  pop the chicken into the oven for 45 mins.  Midway through you may want to flip the chicken so the oils from the chicken soak into the other side and coat the mixture.  If you don't do this you may have some of the flower mixture left of the outside of the chicken without any liquid.

And that's it! Pretty simple, and much healthier than if you would have actually fried it.  
I served it with some home-made mashed potatoes and some steamed veggies.

Enjoy and let me know how it goes!

Wednesday, April 25, 2012

Summer Recipe Adventure

Now that classes are getting out at the college I work at it seems to be getting rather slow.  As summer comes I always need to find new ways to keep busy here; that is how my quilting started, as well as this blog.  With that in mind, I decided I'm going to do a lot more cooking and baking and will add a new section to my blog with all the great recipes I come across and make during this summer. So exciting!

...on a similar topic, I've finally gotten pretty close to my college weight (which I'm pretty excited about!) and need to make sure I keep working out throughout this summer, especially if I'm going to be cooking that much more.  In case anyone cares, =), I started doing the Jillian Michaels workout about a month and a half ago. (30 Day Shred) followed by (Shredded in 30) and they are beyond fantastic.  It's super quick and it kicks your butt.  I know the girls at work keep hearing about it but I just can't help it.  I'm over 10lbs down since I started and it's very addicting. So, if anyone one of you will be following my recipes, you might consider starting some Jillian to go along with it.  ;-)

Monday, April 16, 2012

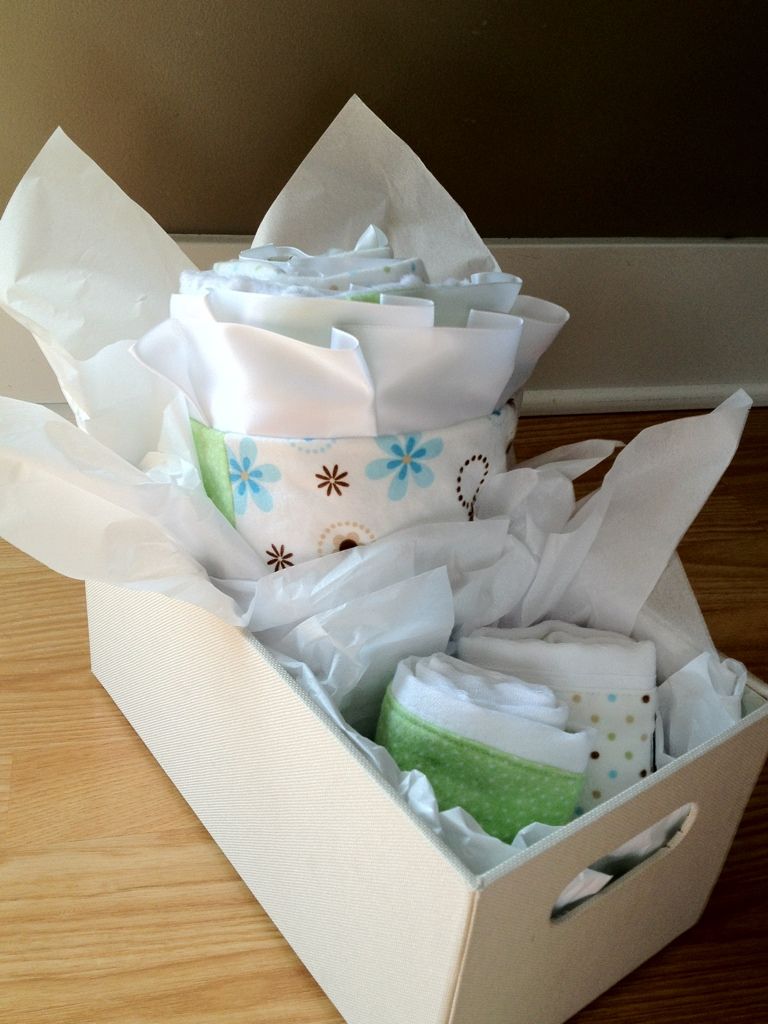
Pretty Minky Baby Gifts

So I finally gave away my two sets of baby gifts.  Both pretty similar but the idea/color schemes was for one in particular.  Thankfully they were both for boys so it was pretty convenient for cutting and such to do them in the same fabrics.  I made a minky backed blanket with textured minky and flannel squares in the front.  Finally I finished it off with some white ribbon for the outsides. 


I also added two cute little matching burp rags which were made from cloth diapers.  Just cut a matching strip that runs the length of the diaper and sew around the edges.  It makes a rather large burp rag so you can fold it a millions times and it's still pretty big. 


I must say, I did turn out pretty nice.  
The best part...it was soooo soft to cuddle with.

[Fabrics from Joan's Fabrics, Fabric Diaper from Target, White Box from Target]


**** ....and just a  quick little second update with the second baby gift.  Much like the first but with an even cuter blue box!
So cute!!

Tuesday, March 27, 2012

Oh So Pretty

It's just getting so nice outside. The last week or so it's been so warm around here that we turned our heat off and been blasting our fan at night to get the cool air in.  It's so great.  We did some major yard work out back trying to get some of the big bushy nasty trees out and hopefully soon we can add a couple of new trees that look much better. Plus, we're gaining some more grassy area which is always nice when you need space to toss the football around with your hubby. ;-)


It's started to get awfully green outside for only being March.  I couldn't resist taking some pretty instagram pics of our back yard. Everything looks so much better outside in the Spring. 

By the way, anyone else use Instagram.  I think I'm in love.